前面写了一篇关于G Suite for Education的注册教程,G Suite for Nonprofits的注册方法相比G Suite for Education要复杂很多,但是由于功能关系,价格相比Education一直低廉。这里我就再说说G Suite for Nonprofits的注册方法。
2019年9月9日更新:《Register a G Suite for Education super admin account》已加密,不再公开对外。但本文既然介绍的是Nonprofit,那就不设置密码了。至于最终你过不过得了Google人工审核一关就看你自己的悟性和运气。
G Suite for Nonprofit就是Google为非营利组织提供的版本,这个版本功能和G Suite for Education差不多,但是区别就是个人云端硬盘容量只有30GB,团队云端硬盘容量是无限的,可以认为是带有团队云端硬盘功能的免费的G Suite Basic,而 G Suite for Education是免费的G Suite Business,这个版本注册需要2步,一步是注册Google for Nonprofit,一步是注册G Suite for Nonprofit,略微麻烦。
首选我们要准备的东西有,Techsoup的验证代码,验证证书,你的域名。
首先进入注册界面https://www.google.com/nonprofits/,点击开始使用
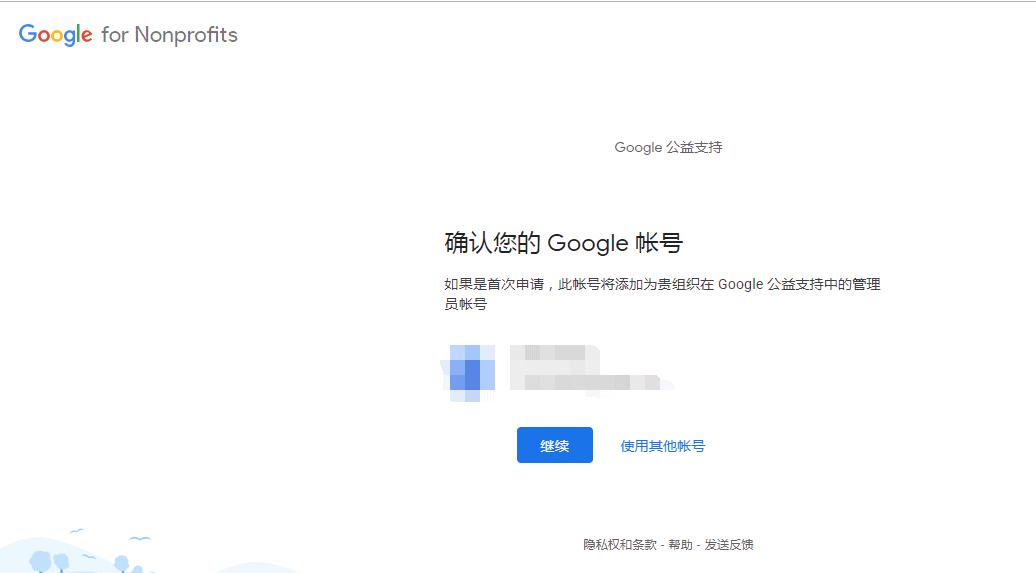
然后随意选择一个自己的邮箱,注意这个邮箱比必须是自己的邮箱,它会作为你Google for Nonprofit的管理员邮箱(注意不是G Suite for Nonprofit)
然后确认你不是属于那些机构。

然后选择你所在的Techsoup注册地区,你在哪的就是注册在哪

然后要选择你输入的Techsoup令牌帐号,可以在你的Techsoup后台找到

然后会显示你令牌所属的组织,确认即可,一般是正确的。

然后输入你所在组织的网址(一定要正确)和电话

然后确认你的联络信息和电子邮件地址,一般是你注册的电子邮件地址

然后你的组织同意条款,然后点击确定

如果没有错误,你会收到通过验证的界面,可以激活产品了

注册成功Google for Nonprofits的管理员,然后进去管理员后台后,选择激活G Suite for Nonprofits

然后输入你的域名,注意一定要和你网站的域名一致才能验证通过

然后我们就正式开始了注册G Suite for Nonprofits的流程

然后输入你的单位名称和人数,人数随意选择,反正G Suite for Nonprofits版人数也是无限的

然后选择国家和电话,要和前面的一致

然后输入你的邮件地址,和你的Google for Nonprofits管理员邮箱一致即可

然后选择你的域名,添加进去

创建你自己的帐号,到最后通过人机验证就可以了

然后我们进入后台参考教育版的注册设置好域名后,会发现我们现在仍然是14天的试用期

然后回到你的Google for nonproftis界面,https://www.google.com/intl/zh-cn/nonprofits/ 登录你上面的帐号,输入你的域名,选择激活

然后它会提示你已经收到激活申请,需要3天去激活

然后你的邮箱会收到一个邮件,告诉你3个工作日联系你

然后你只要等下一个工作日,会给你发一封审核通过的邮件

至此注册就全部完成了,到结算界面可以看到,订阅试用期已经消失,变成了免费订阅字样


![Oracle Cloud 甲骨文云 智利圣地亚哥[AMD] 融合怪测评-CNBoy 四海部落](https://cnboy.org/wp-content/uploads/zhuanti-oracle-220x150.png)